You can create your API key using Google AI Studio with a single click.
Remember to treat your API key like a password. Don’t accidentally save it in a notebook or source file you later commit to GitHub. In this notebook we will be storing the API key in a .env file. You can also set it as an environment variable or use a secret manager.
Another option is to set the API key as an environment variable. You can do this in your terminal with the following command:
$ export GEMINI_API_KEY="<YOUR_API_KEY>"
Load the API key
To load the API key from the .env file, we will use the dotenv package. This package loads environment variables from a .env file into process.env.
$ npm install dotenv
Then, we can load the API key in our code:
const dotenv =require("dotenv") astypeofimport("dotenv");dotenv.config({ path:"../.env",});const GEMINI_API_KEY =process.env.GEMINI_API_KEY??"";if (!GEMINI_API_KEY) {thrownewError("GEMINI_API_KEY is not set in the environment variables");}console.log("GEMINI_API_KEY is set in the environment variables");
GEMINI_API_KEY is set in the environment variables
Note
In our particular case the .env is is one directory up from the notebook, hence we need to use ../ to go up one directory. If the .env file is in the same directory as the notebook, you can omit it altogether.
With the new SDK, now you only need to initialize a client with you API key (or OAuth if using Vertex AI). The model is now set in each call.
const google =require("@google/genai") astypeofimport("@google/genai");const ai =new google.GoogleGenAI({ apiKey: GEMINI_API_KEY });
Select a model
Now select the model you want to use in this guide, either by selecting one in the list or writing it down. Keep in mind that some models, like the 2.5 ones are thinking models and thus take slightly more time to respond (cf. thinking notebook for more details and in particular learn how to switch the thiking off).
const videoFile =awaitdeferredFileUpload(VIDEO_FILE_PATH, { displayName:"American black bears",});
current file status (American black bears): PROCESSING
File is still processing, retrying in 5 seconds
current file status (American black bears): PROCESSING
File is still processing, retrying in 5 seconds
current file status (American black bears): ACTIVE
File is still processing, retrying in 5 seconds
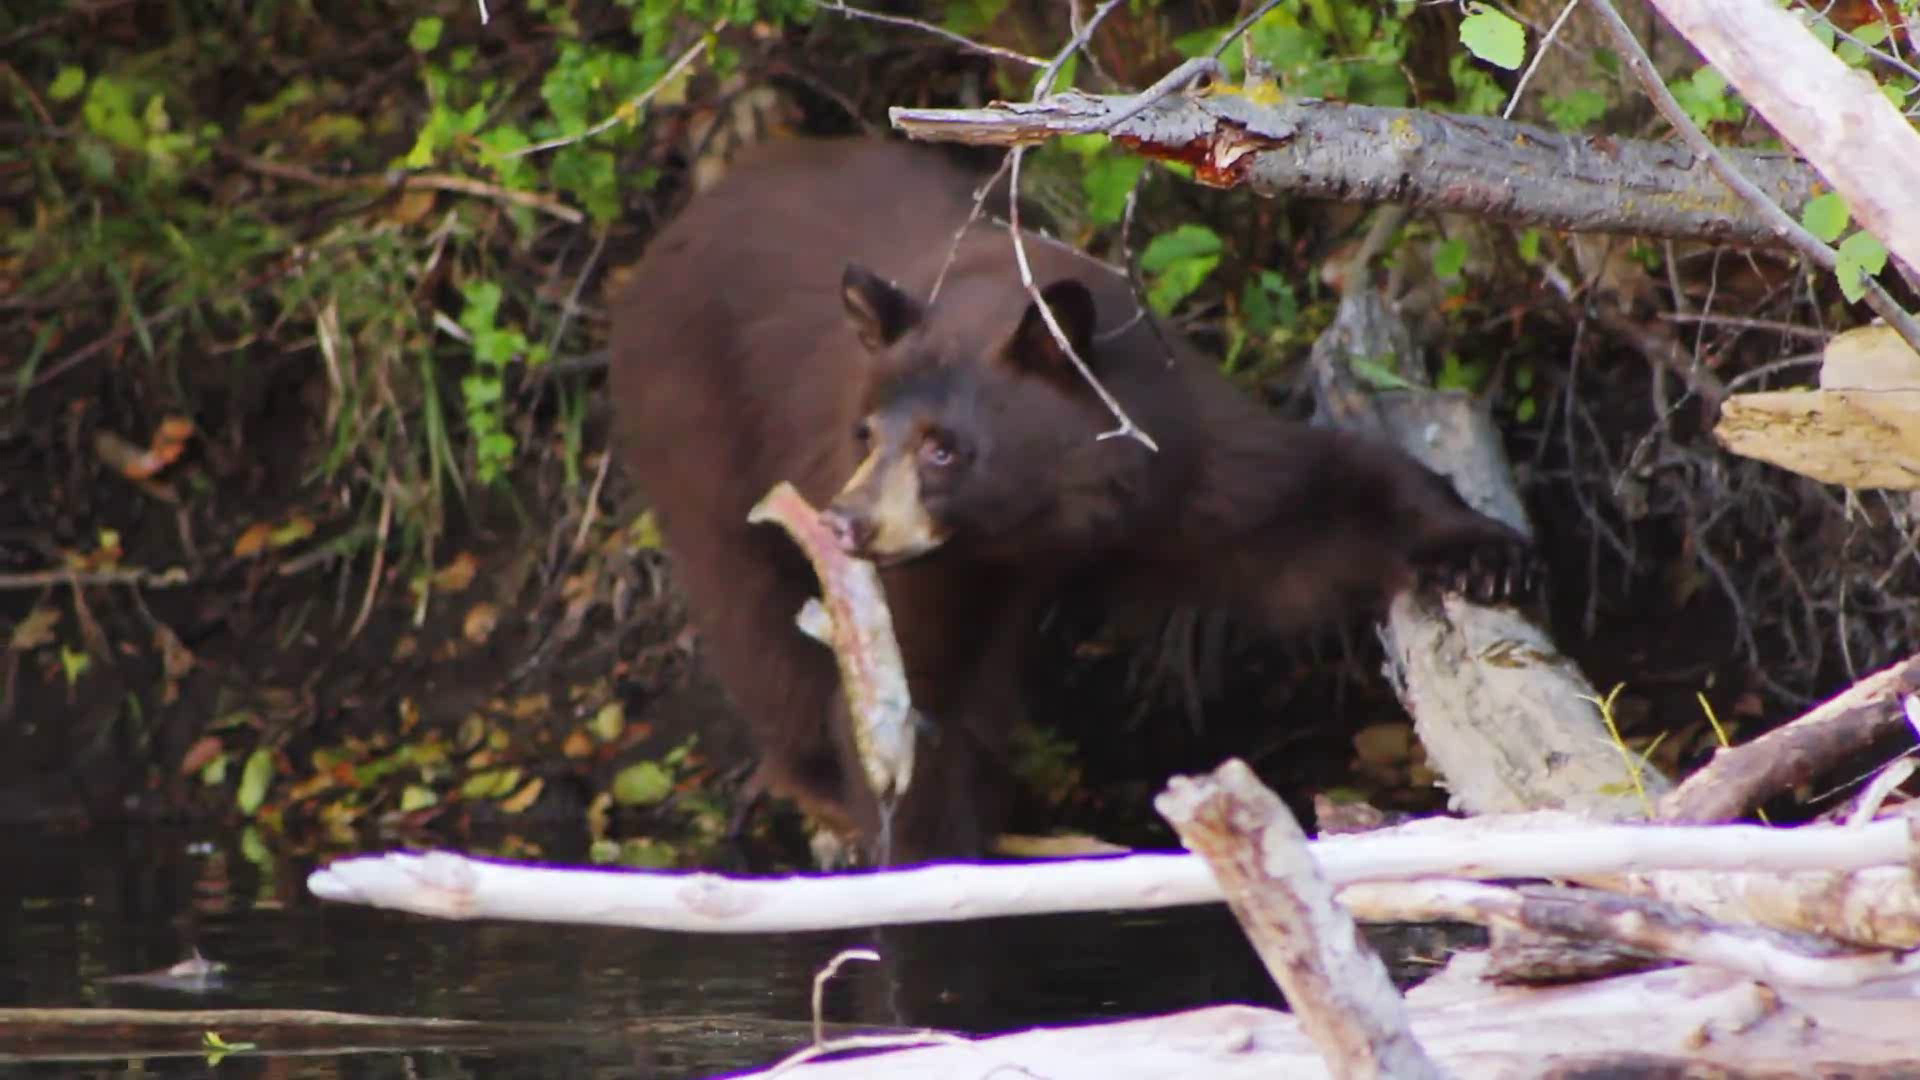
To demonstrate the video content, display the first frame:
The uploaded video is ready to be analyzed. The constructed prompt instructs the model to classify animals in the video. In addition to providing both their English and Latin names.
const response =await ai.models.generateContent({ model: MODEL_ID, contents: ["Please identify the animal(s) in this video", google.createPartFromUri(videoFile.uri??"", videoFile.mimeType??"video/webm"), ], config: { systemInstruction:"You are a zoologist whose job is to name animals in videos. You should always provide an english and latin name.", },});tslab.display.markdown(response.text??"No response text available");
Observing the video, I can identify:
English Name: American Black Bear (and an American Black Bear cub) Latin Name:Ursus americanus
The adult bear, despite its brown coloration (which is common for American Black Bears, especially in western North America), exhibits the typical facial profile, rounded ears, and lack of a pronounced shoulder hump characteristic of Ursus americanus. The second, smaller individual emerging from the foliage is clearly a cub, indicating a mother and her offspring. Their behavior, particularly the attempt to catch fish and movement in and out of the water, is consistent with American Black Bear foraging activities in their natural habitat.
As you can see, the model accurately named the animal and provided a correct Latin name.
You can delete the video to prevent unnecessary data storage.